How to sync your email with the iOS mail app
This guide explains how to sync your email on an iPhone or iPad using the built-in iOS mail app.
Step-by-Step Configuration
1. Add your account
On your device, tap Settings → Apps → Mail → Mail Accounts → Add Account → Microsoft Exchange.
2. Add your email address
Enter your complete email address and add an optional description (like "Work Email") to easily identify it.
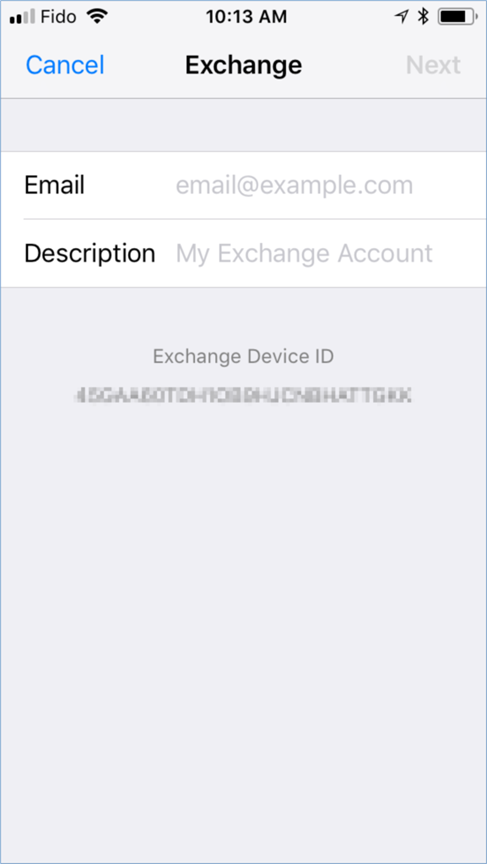
3. Enter your server settings
Tap Configure Manually and input the following parameters:
- Email: Your full email address
- Server: Your specific server address (see the chart below)
- Username: Your full email address
- Password: Your mailbox account password
Domain Field Matching Rule:
In the Domain box, match the entry to your server profile prefix. For example, if your webmail setup starts with webmail19, enter S19. If it begins with webmail14, enter S14.
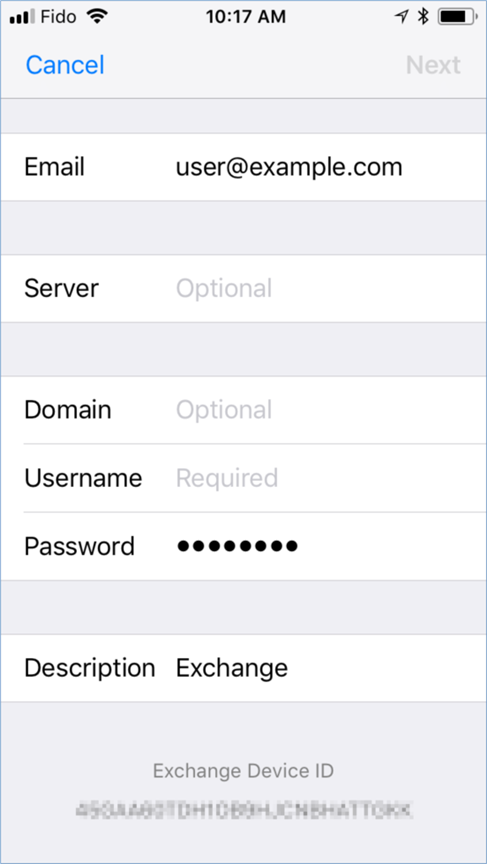
Use this reference chart to confirm your server settings. If you aren't sure which cluster your account sits on, contact our team.
4. Select sync options
Once your profile authenticates, toggle the switches to choose which data nodes you want to keep synced with your device:
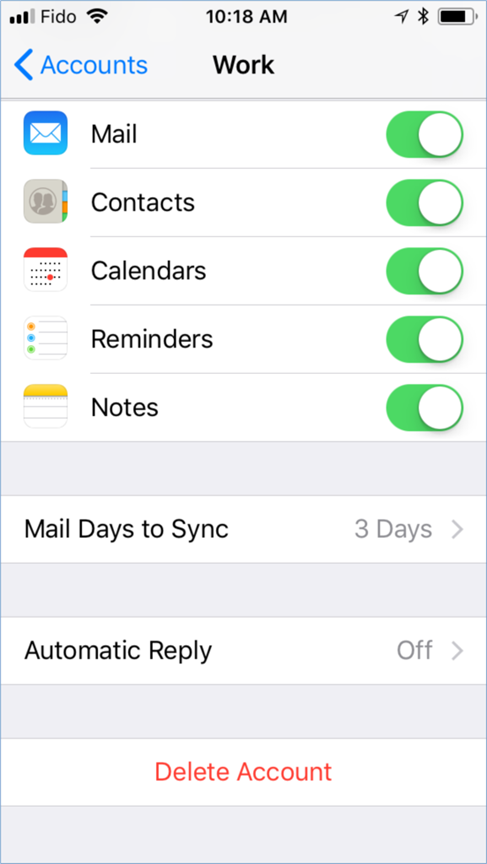
5. Sync Window Optimization (Optional)
You can adjust the depth of your history cache by changing the Mail Days to Sync timeframe parameters: